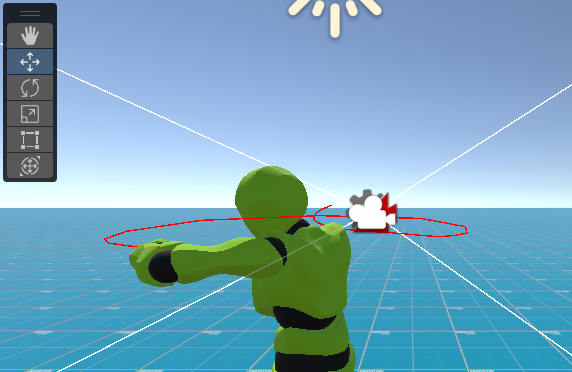
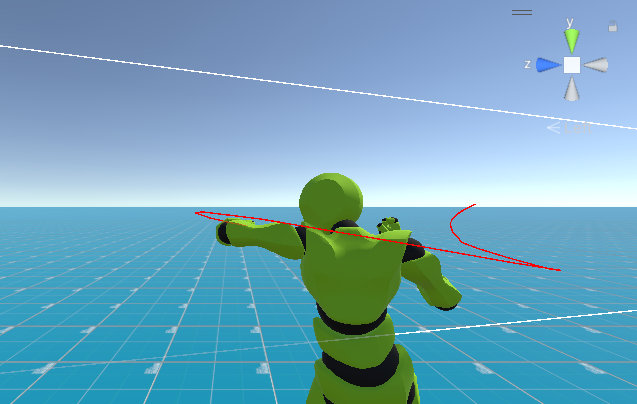
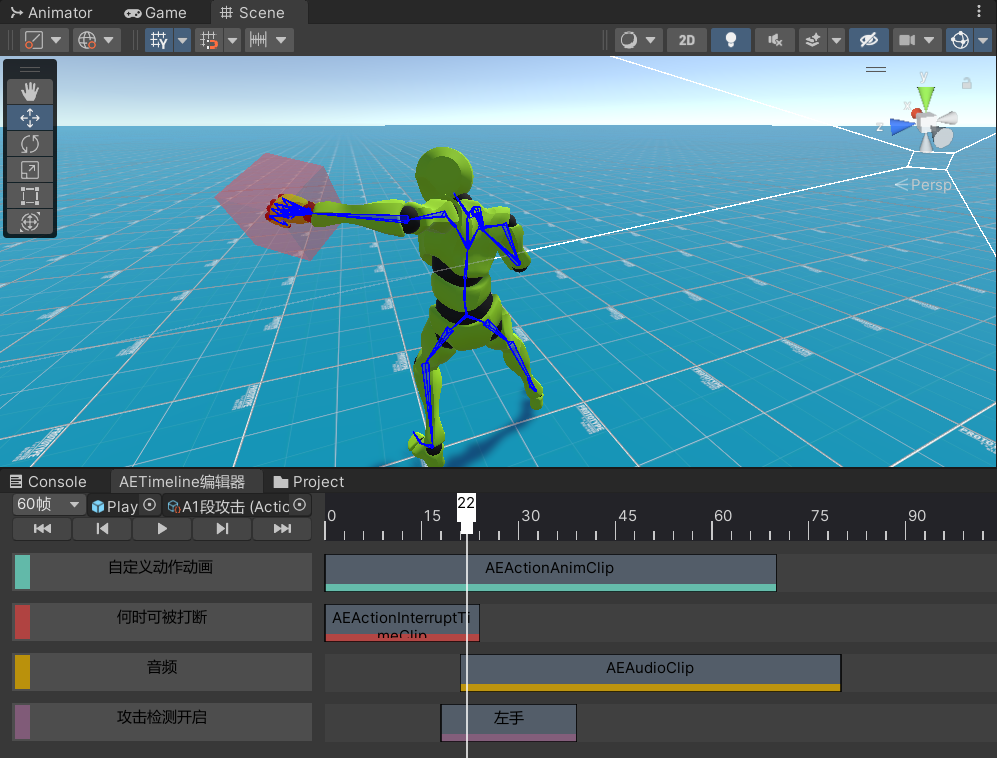
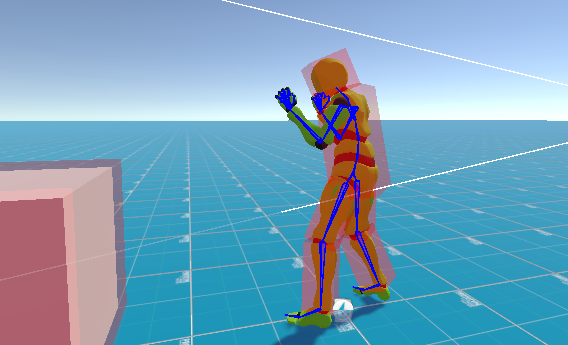
攻击检测 射线检测 使用射线连续检测 攻击轨迹。
不仅仅是一条轨迹,可以定义检测长度 、检测密度 。
但是现在是离散的 ,可以记录上一次Direction 得到连续的射线。
主要逻辑代码:
1
2
3
4
5
6
7
8
9
10
11
12
13
14
15
16
17
18
19
20
21
22
23
24
25
public void Tick (float delta) if (CanDetection) { if (prePosition != Vector3.zero) { var temp = Length / DetectionDensity; for (int i = 0 ; i < DetectionDensity; i++) { var des = TargetTransform.position + TargetTransform.TransformDirection (Direction) * temp * i; var desPre = prePosition + lastDiraction * temp * i; if (Physics.Raycast (desPre, des - desPre, out RaycastHit hitInfo, (des - desPre).magnitude, HitBoxLayer)) { Debug.Log ("击中了!!!" + hitInfo.collider.gameObject.name); } } } prePosition = TargetTransform.position; lastDiraction = TargetTransform.TransformDirection (Direction); } prePosition = TargetTransform.position; }
但是可能还是会有点问题的,因为,Unity中如果射线检测的起点在Collider里面 无论是RayCast还是LineCast都无法检测到。
球形检测与盒状检测 虽然有射线检测了,但是还是不是在所有情况下通用,比如使用腿部攻击的时候可能动画攻击的方向不同,但是我们的检测方向是固定的,这就造成了在某些动画中不通用的情况。
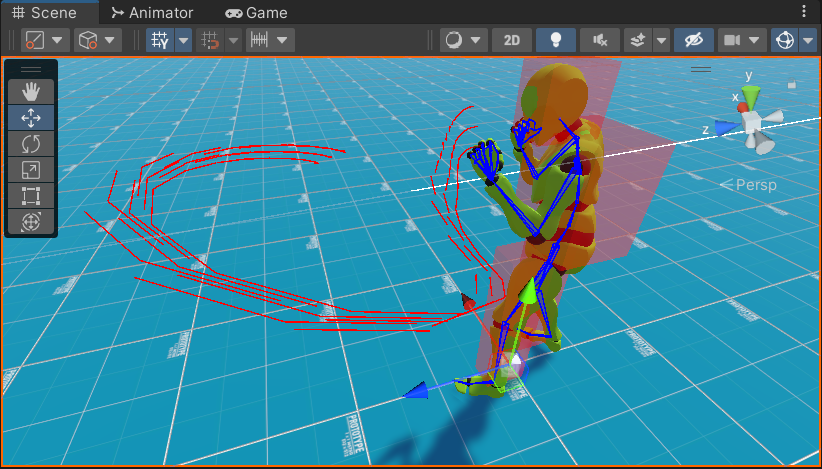
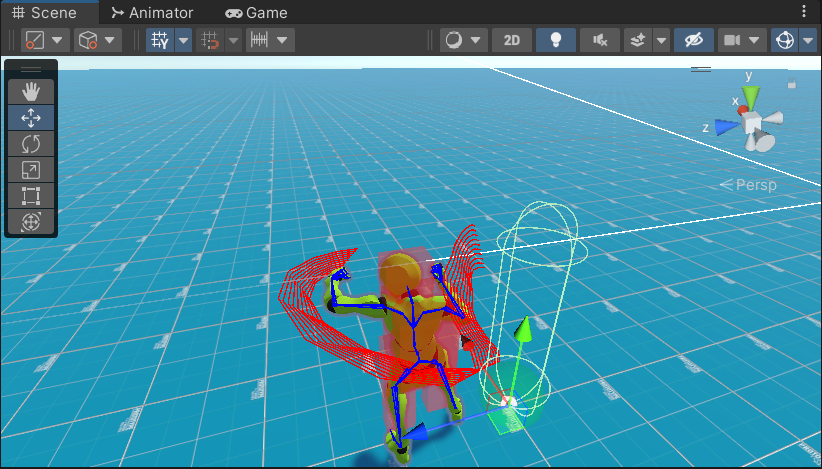
所以我们增加球形检测和盒状检测。如下面图片所示,就是在时间点持续在某个位置进行特定形状的碰撞检测。
主要代码:
1
2
3
4
5
6
7
8
9
10
11
12
13
14
15
16
17
18
19
20
21
22
23
24
25
26
27
28
29
30
31
32
33
34
private void BoxDetection (){ var collider = Physics.OverlapBox(TargetTransform.TransformPoint(Params.BoxCenter), Params.BoxHalfExtents, TargetTransform.rotation, HitBoxLayer); for (int i = 0 ; i < collider.Length; i++) { HitCollider(collider[i]); } } private void RayDetection (){ if (CanDetection) { if (prePosition != Vector3.zero) { var temp = Params.RayLength / Params.RayDetectionDensity; for (int i = 0 ; i < Params.RayDetectionDensity; i++) { var des = TargetTransform.position + TargetTransform.TransformDirection(Params.RayDirection) * temp * i; var desPre = prePosition + lastDiraction * temp * i; if (Physics.Raycast(desPre, des - desPre, out RaycastHit hitInfo, (des - desPre).magnitude, HitBoxLayer)) { HitCollider(hitInfo.collider); } } } lastDiraction = TargetTransform.TransformDirection(Params.RayDirection); } }
受击盒子 在运行时生成BoxCollider ,在编辑器模式下使用Gizom可视化。
1
2
3
4
5
6
7
8
9
10
11
12
13
14
15
16
17
18
19
20
public void Init (GameObject context) Collider = TargetTransform.gameObject.AddComponent <BoxCollider>(); Collider.isTrigger = true ; Collider.center = Offset; Collider.size = Box; } public void OnDrawGizmos () if (Application.isPlaying && CanHit && DebugMode && TargetTransform != null) { Gizmos.color = new Color (1 , 0 , 0 , 0.5f ); Gizmos.matrix = TargetTransform.localToWorldMatrix; Gizmos.DrawCube (Offset, Box); } if (!Application.isPlaying && DebugMode && TargetTransform != null) { Gizmos.color = new Color (1 , 0 , 0 , 0.5f ); Gizmos.matrix = TargetTransform.localToWorldMatrix; Gizmos.DrawCube (Offset, Box); } }
攻击特效 Unity 2018 - Game VFX - Weapon Trails / Slash Tutorial (youtube.com)
How To Create Trail Mesh (Unity) (트레일 메쉬 생성 툴) (youtube.com)
https://github.com/Ageia/Unity_MotionPath_MeshMaker
暂时先做不特效了
管理器 在角色身上挂多个相同脚本是在不方便,直接用管理器代替,之前的相同脚本改为普通类。
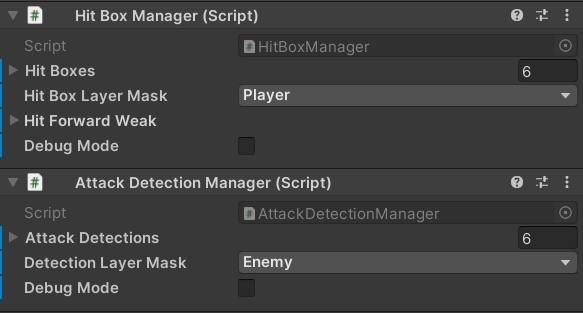
使用对应管理器统一管理所有受击和伤害脚本,使用List是为了在面板上可序列化,为了方便使用Map建立对应的查找关系。
1
2
3
4
5
6
7
8
9
10
11
12
13
14
15
16
17
18
19
20
21
22
23
24
25
26
27
28
public class AttackDetectionManager : MonoBehaviour { public List<AttackDetection> AttackDetections; private Dictionary<string, int > Map; public void Init () { Map = new Dictionary <string, int >(AttackDetections.Count); for (int i = 0 ; i < AttackDetections.Count; i++) { Map.Add (AttackDetections[i].Name, i); } } } public class HitBoxManager : MonoBehaviour { public List<HitBox> HitBoxes; private Dictionary<string, int > Map; public void Init () { InitNameToIndex (); for (int i = 0 ; i < HitBoxes.Count; i++) { HitBoxes[i].Init (gameObject); } } }
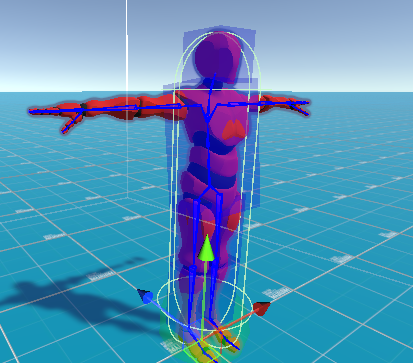
取消CharacterController的碰撞体功能 由于我们需要精确的碰撞检测,如下图,我们只需要蓝色盒子作为碰撞体,而不需要CharacterController自带的胶囊碰撞体,并且我们不希望CharacterController之间发生碰撞。
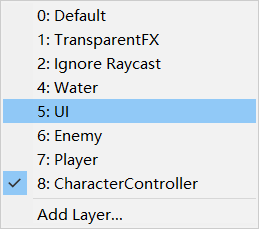
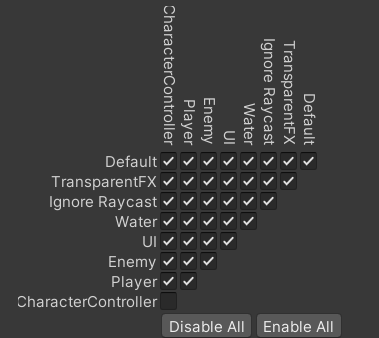
我们新增层级为CharacterController,并且取消掉CharacterController之间的碰撞。
最后我们设置玩家的受击盒子层级与攻击检测层级,以确保可以攻击到敌人,确保自己的层级正确。
